 Introductie
Een MySQL database is erg makkelijk op te zetten. In Ubuntu is één commando genoeg;
apt-get install mysql-server
Echter, bij grotere website omgevingen kan MySQL met de vele opties die worden ondersteund nog behoorlijk worden geoptimaliseerd en uitgebreid. In dit artikel ga ik in op de Master-Master replica.
Waarom master-master
Als Mysql de load niet meer aan kan door de complexe of vele request die binnen komen, dient er actie te worden genomen. Vaak is het noodzakelijk om de website applicatie aan te passen die de vele en zware database requests vraagt. Echter kan dit niet altijd. Hiervoor is een master-master repclica ideaal.
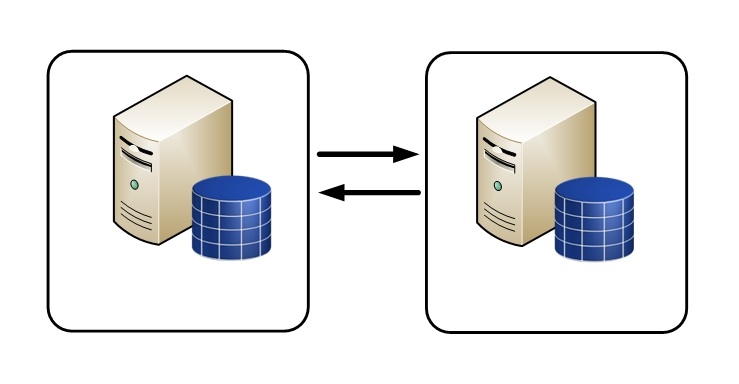
De meeste websites sturen veel meer SELECT querys dan UPDATE of INSERT querys bij deze opzet is een master-slave database opzet ideaal. Een master repliceert zijn databases naar een of meerdere slaves. De webservers sturen alle SELECT requests naar de slaves. De update en INSERT querys moeten wel naar de master worden gstuurd aangezien de slaves alleen – lezen zijn. Mocht het niet mogelijk zijn om de code van de site aan te passen dint er gebrui te worden gemaakt van een master- master opzet. Hierin zijn 2 servers die van elkaar slaves zijn. Hirdoor zijn beide databases reas-write, en repliceren ze de data naar elkaar.
Voordelen vs nadelen
Op het eerste gezicht klinkt Master-Master geweldig. Je hoeft geen ingewikkelde codes te schrijven om de satabases te benaderen. De webservers kunnen over de twee databases worden verdeeld. Ook maakt het niet uit naar welke database wordt geschreven aangezien het ook naar de andere server wordt gerepliceerd.
Echter zijn er ook grote nadelen; de oplossing is niet schaalbaar. Een 3e master is wel mogelijk, alleen is de ketting dan zo sterk als de zwakste schakel. Mocht er één server uitvallen, dan is het cluster al niet meer consistent. Ook is het bijna onmogelijk om een cluster weer synchroon te krijgen mocht er een storing zijn geweest op één van de servers. Aangezien er op alle servers wordt geschreven kunnen de servers bij een connectie issue los van elkaar gaan opereren. Het is dan niet meer mogelijk om te zien welke server de recentste data heeft. Dit is het grootste issue van deze oplossing.
Alternatieven
Er zij vle methodes om databases te repliceren. Welke de beste oplossing is is niet te zeggen. Ook hier geldt;voorkomen is beter dan genezen en ‘keep it simple’? Want Je ontkomt er niet aan. Elke database replica zal ooit inconsistent worden. Een replica kan om verschillende redenen worden gemaakt;
Failover;. Indien de server stuk gaat, moet een andere database server de load overnemen.
Load ballancing; indien er teveel requests zijn voor een server moet de load over meerdere servers worden verdeeld.
Off-site processing; het maken van backups, of het uitvoeren van report
Queries kunnen het beste op een losse database server worden uitgevoerd.
Maar alternativn kunnen ook in een andere hoek worden gEzocht. Een daarvan is Memcached. Dit is een caching meganisme voor onder andere databases. Dit wordt in een ander artikel uitgelegd.
Installatie Master-Master
Benodigdheden
Server 1:
Ip address 10.0.0.100
Server 2
ip addres: 10.0.0.101
Binlogs
Om te beginnen moeten beide servers hun binlog bijhouden. Dit is een bestand waarin alle schrijf wijzigingen worden bijgehouden. Alle slaves lezen deze log en zetten de gegevens in hun relay log. Deze log sordt in de database uitgevoerd.
Het aanzetten vand de logs moet op beide svers gebeuren aangezien ze master van elkaar zijn
- Both Master and Slave are debian squeeze machines.
- Master has static IP: 10.100.10.80.
- Slave has static IP: 10.100.10.103.
- Master and Slave are on the same LAN.
- Master has MySQL installed and you have the root password to connect to it from ‘localhost’. MySQL does not allow remote connections by default, and that was our case too.
- Slave does not have MySQL installed yet.
- Master debian allows incoming connections on 3306 port, the standard MySQL listening port.
PHASE 1
Overview
In the first phase of the work, the overview of what we did is as follows:
1) On Master
- Allow remote connections
- Set bind-address
- Enable binary logging
- Establish a unique server ID
- Restart server
- Create a user for replication
3) Set binary log file pattern
The parameter is called log_bin and it should exist in the [mysqld] section. Note that the full path to the binary log file should be given. Example: /var/log/mysql/mysql-bin.log.
Important gotcha: make sure that the folder/disk has enough space to write the binary logs there.
4) Set server id
This is the Master replication server ID. It has to be unique among all the ids used in the whole replication setup. For example, set this to “100” and make sure that you set “101” on your Slave (see later).
The parameter is server-id and should be set in the section [mysqld].
5) innodb_flush_log_at_trx_commit and sync_binlog
These should be set to “1”, both of them. According to MySQL documentation for the greatest possible durability and consistency in a replication setup using InnoDB with transactions … you have to do this. More on this you can find here.
These parameters are set in section [mysqld].
6) RESTART MySQL Server
Having done all the necessary changes on the configuration file of MySQL Server and having granted access to all existing users to be able to connect using their IP, you can restart your MySQL Server.
7) Create user for replication
You need to create a user that will have the right to work as the replication/slave client. The following commands:
mysql> create user ‘repl’@’10.100.10.103’ identified by ‘slavepassword’;
mysql> grant all on *.* to ‘repl’@’10.100.10.103’;
mysql> flush privileges;
are creating the user ‘repl’ and give him the right to do replication from the slave machine with IP 10.100.10.103 using the specified password.
On Slave
1) Install MySQL Server
On Slave machine you need to install MySQL Server.
2) Stop MySQL server
You do not need to have it running, for the time being. Proceed with changing MySQL configuration parameters to support Slave replication.
3) bind-address
Set bind-address to the value of the IP of your Slave machine. In our case was 10.100.100.103. The parameter should be set in the [mysqld] section.
4) log_bin
Set the full path to the binary log file. For example: /var/mysql/log/mysql-bin.log. The parameter is set in the [mysqld] section of the my.cnf file.
Important gotcha:: make sure that your binary log folder has lots of space. You will need it.
5) server-id
You need to give the server ID for the Slave node for this replication setup. Put for example “101”. It has to be different from the server IDs of the Master and other Slave nodes in your configuration.
Do not start Slave MySQL server. You still do not need to do that.
You are done for now. Phase 1 is finished.
In Phase 2, we will start replication.
